- Overall development
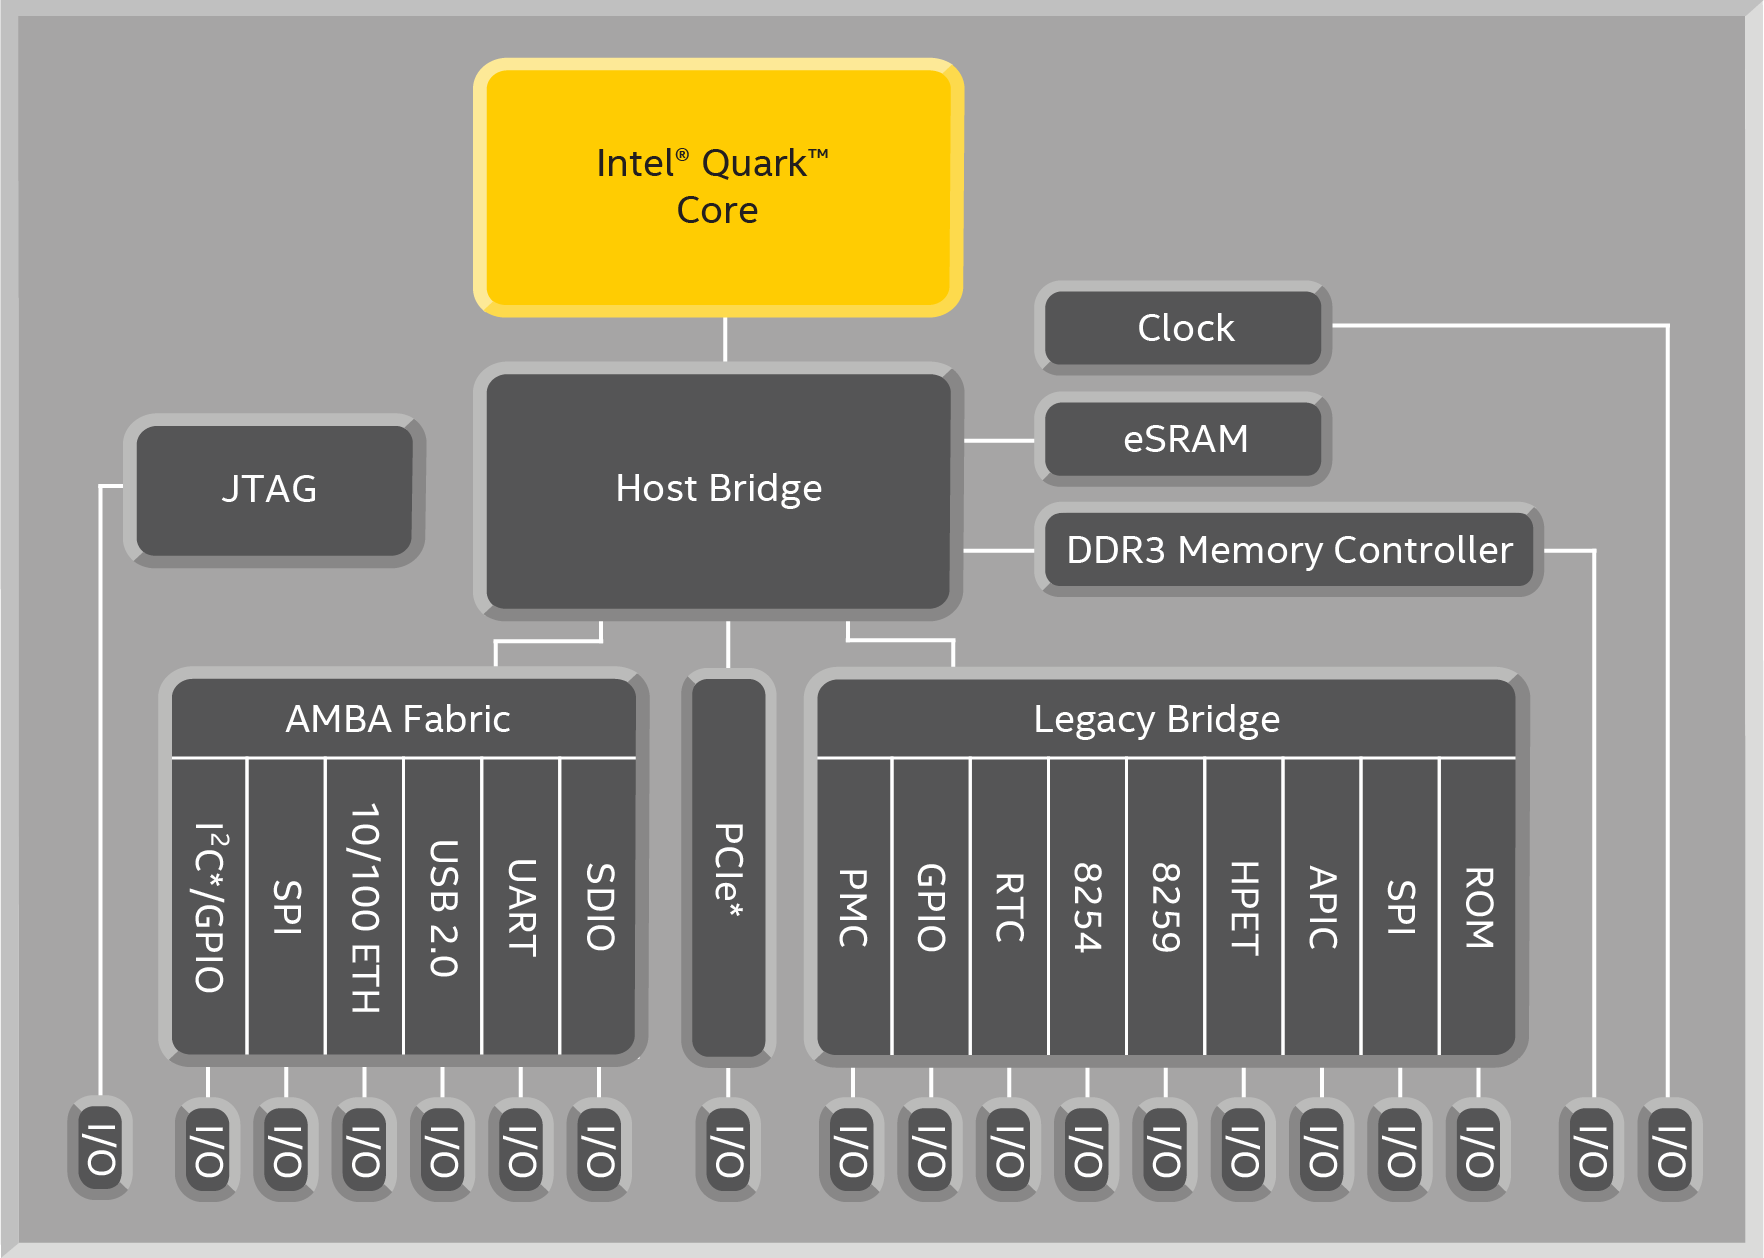
- SoC support
- FSP 1.1 integration
- Board support
- Quark™ FSP
- CorebootPayloadPkg
|
The Quark™ SoC code was developed using the
Galileo Gen 2
board:
|
Build Instructions:
build  -p CorebootPayloadPkg/CorebootPayloadPkgIa32.dsc  -a IA32  \
    -t GCC48  -b DEBUG  -DDEBUG_PROPERTY_MASK=0x27  \
    -DDEBUG_PRINT_ERROR_LEVEL=0x80000042  -DSHELL_TYPE=BUILD_SHELL  \
    -DMAX_LOGICAL_PROCESSORS=1
ls Build/CorebootPayloadPkgIA32/DEBUG_GCC48/FV/UEFIPAYLOAD.fd
build  -p CorebootPayloadPkg\CorebootPayloadPkgIa32.dsc  -a IA32  -t VS2015x86  -b DEBUG  -DDEBUG_PROPERTY_MASK=0x27  -DDEBUG_PRINT_ERROR_LEVEL=0x80000042  -DSHELL_TYPE=BUILD_SHELL  -DMAX_LOGICAL_PROCESSORS=1
dir Build\CorebootPayloadPkgIA32\DEBUG_VS2015x86\FV\UEFIPAYLOAD.fd
Use the following steps to setup a build environment:
export WORKSPACE=$PWD
export PACKAGES_PATH="$PWD/edk2:$PWD/edk2-non-osi"
cd edk2
export WORKSPACE=$PWD
. edksetup.sh
set WORKSPACE=%CD%
set PACKAGES_PATH=%WORKSPACE%\edk2;%WORKSPACE%\edk2-non-osi
set EDK_TOOLS_BIN=%WORKSPACE%\edk2-BaseTools-win32
cd edk2
edksetup.bat
Getting the Quark FSP source:
Building QuarkFspPkg:
Build Instructions:
build -p QuarkPlatformPkg/Quark.dsc  -a IA32  -t GCC48  -b DEBUG  -DDEBUG_PROPERTY_MASK=0x27  -DDEBUG_PRINT_ERROR_LEVEL=0x80000042
ls Build/Quark/DEBUG_GCC48/FV/Quark.fd
build -p QuarkPlatformPkg/Quark.dsc  -a IA32  -t VS2012x86  -b DEBUG  -DDEBUG_PROPERTY_MASK=0x27  -DDEBUG_PRINT_ERROR_LEVEL=0x80000042
dir Build\Quark\DEBUG_VS2012x86\FV\Quark.fd
Documentation:
Modified: 17 May 2016